What is after the first 1. 2. 3. 4. steps ?

|
| RPI Info RPI 1-Wire ® RPI 1-Wire ® Temperature (DS18B20) RPI i2c. RPI i2c. 16 LED Output (MCP23017) |
RPI i2c bus 16 I/O (mcp23017)This guide shows how to get 16 I/O with 1 MCP23017 and a Raspberry pi - Here only used as output !!
Recommended standard reusable hardware
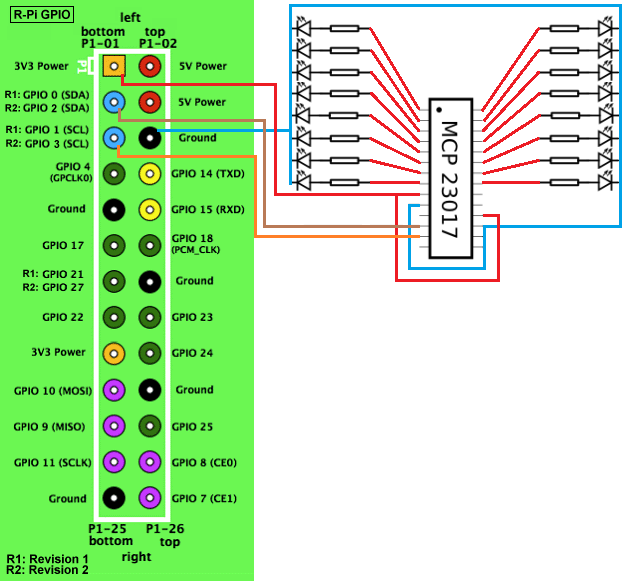
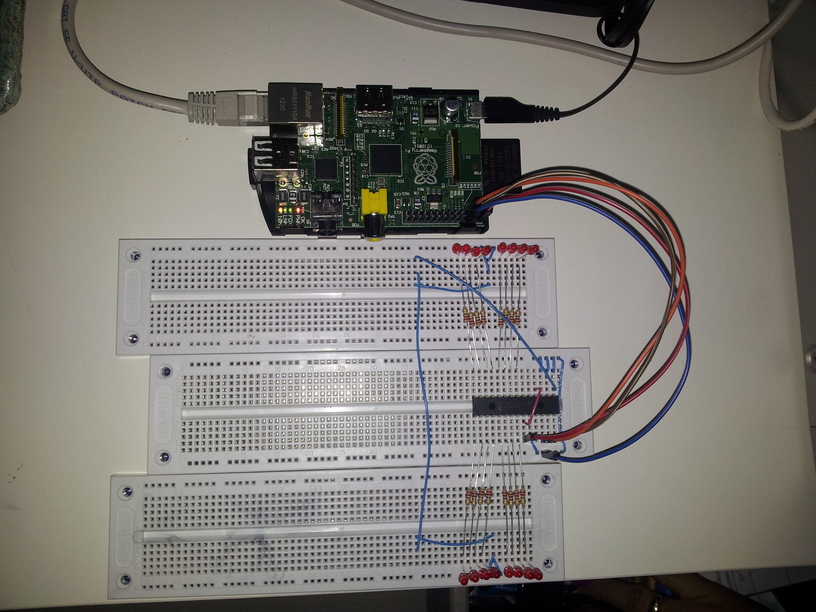
Use donate button if you like my guides, or if you want a new guide ( See missing work ). Datasheet i2c 16-Bit I/O Expander (MCP23017) Connect the circut, as shown. - If you what multible MCP23017, you shoot set the address, by pin 15, 16, 17 

Start with prepare a Raspberry pi with supported os - my prefered is Raspbian “wheezy” Direct download my server (2013-05-25) You can find my bref installation guide in RPI Info ■SSH into your Raspberry Pi ■Open the raspi-black-list.conf file using the following command : “sudo vi /etc/modprobe.d/raspi-blacklist.conf” ■Comment out the “blacklist i2c-bcm2708” entry by putting a hash # sign in front of it. So it looks like “#blacklist i2c-bcm2708” ■At this point you can also enable SPI device access by putting a hash # sign in front of “blacklist spi-bcm2708“. ■You then need to save your changes (:wq in vi) and reboot using the “sudo reboot” command. ■Now every time you reboot you will still need to perform two things to enable I2C: ■Type “sudo modprobe i2c-dev” and ■Type “sudo chmod o+rw /dev/i2c*“ Sample bash code for fast run !! |